
Outline
- Introduction
1.1. Importance of Good Car Photos for Driving Instructors
1.2. Overview of the Article - What to Shoot: Setting the Stage for the Perfect Car Photo
2.1. Cleanliness and Branding
2.2. Avoiding Damage and Imperfections - What to Shoot With: Choosing the Right Camera
3.1. Smartphone Cameras: The New Standard
3.2. Compact Cameras and DSLRs: When to Use Them - When to Shoot: The Best Time for Car Photography
4.1. The Problems with Direct Sunlight
4.2. The Golden Hour: Why It’s Perfect for Car Photos
4.3. Overcast Days and Their Challenges - Where to Shoot: Picking the Right Location
5.1. Realistic Locations Matter
5.2. Tidy Suburban Streets vs. Busy Town Streets
5.3. Avoiding Distractions and Cluttered Backgrounds - How to Shoot: Framing the Perfect Shot
6.1. Simple Composition for Clear Branding
6.2. Eye-Level Shots and Straight-On Perspectives
6.3. Using Different Angles for Variety - Post-Processing: Enhancing Your Car Photos
7.1. Why Post-Processing Is Essential
7.2. Basic Editing Tips
7.3. Using Software and Apps for Better Results - Conclusion
8.1. Recap of the Key Tips
8.2. Encouragement to Take Better Photos
8.3. Final Thoughts on Car Photography for Driving Instructors - FAQs
9.1. Can I Use My Phone for Professional Car Photos?
9.2. What if My Car Isn’t in Perfect Condition?
9.3. Should I Avoid Using Filters?
9.4. What’s the Best Software for Editing Car Photos?
9.5. Can I Take Photos in the Winter or Bad Weather?
Take Better Photos of Your Car in 6 Simple Steps
Introduction
As a driving instructor, the first thing many prospective students will look at when choosing an instructor is your car. That’s why having high-quality, appealing photos of your vehicle is essential. Not only do these images showcase your car, but they also reflect the professionalism and attention to detail you offer as an instructor. Fortunately, you don’t need to hire a professional photographer to capture the perfect shots. With a few simple tips and tricks, you can achieve great results with minimal cost and effort. In this article, we’ll walk through six easy steps to help you take better photos of your car.
What to Shoot: Setting the Stage for the Perfect Car Photo
Cleanliness and Branding
Before you even think about picking up your camera or phone, ensure your car is spotless. Dirty windows, unwashed exteriors, or clutter inside the car can make your vehicle look unprofessional. A clean car reflects the care you put into your services. Also, make sure all the branding on your car is clearly visible. If the stickers or logos are peeling or worn out, they can give the wrong impression.
Avoiding Damage and Imperfections
Take a good look at your car for any noticeable damage like scratches, dents, or worn-out tires. These details should be addressed before taking photos. A pristine car exudes trustworthiness and reliability, which is exactly what you want to convey to potential students.
What to Shoot With: Choosing the Right Camera
Smartphone Cameras: The New Standard
These days, smartphones offer impressive camera technology that can rival traditional cameras, especially the latest models like the iPhone 5S or Samsung Galaxy. With a good smartphone camera, you can take high-quality photos that are perfectly suitable for your website or social media ads.
Compact Cameras and DSLRs: When to Use Them
While smartphones work well, a compact camera or DSLR can offer even better results. If you have access to a DSLR, it can provide superior image quality and greater control over settings. However, if you’re just starting out, don’t worry — a good smartphone camera will do just fine for most situations.
When to Shoot: The Best Time for Car Photography
The Problems with Direct Sunlight
Direct sunlight may seem like the ideal lighting situation, but it actually creates harsh shadows, bright reflections, and can cause your photos to appear overexposed. Avoid shooting in the middle of the day when the sun is at its peak.
The Golden Hour: Why It’s Perfect for Car Photos
The best time to photograph your car is during the golden hour — early in the morning or late in the evening. The light is softer and more flattering during these times, providing the perfect conditions for a clear and inviting car photo.
Overcast Days and Their Challenges
Overcast days can create dull, washed-out images, making the photo appear flat. If you must shoot on a cloudy day, try to position the car so that it catches some natural light, avoiding any overly gray or gloomy skies.
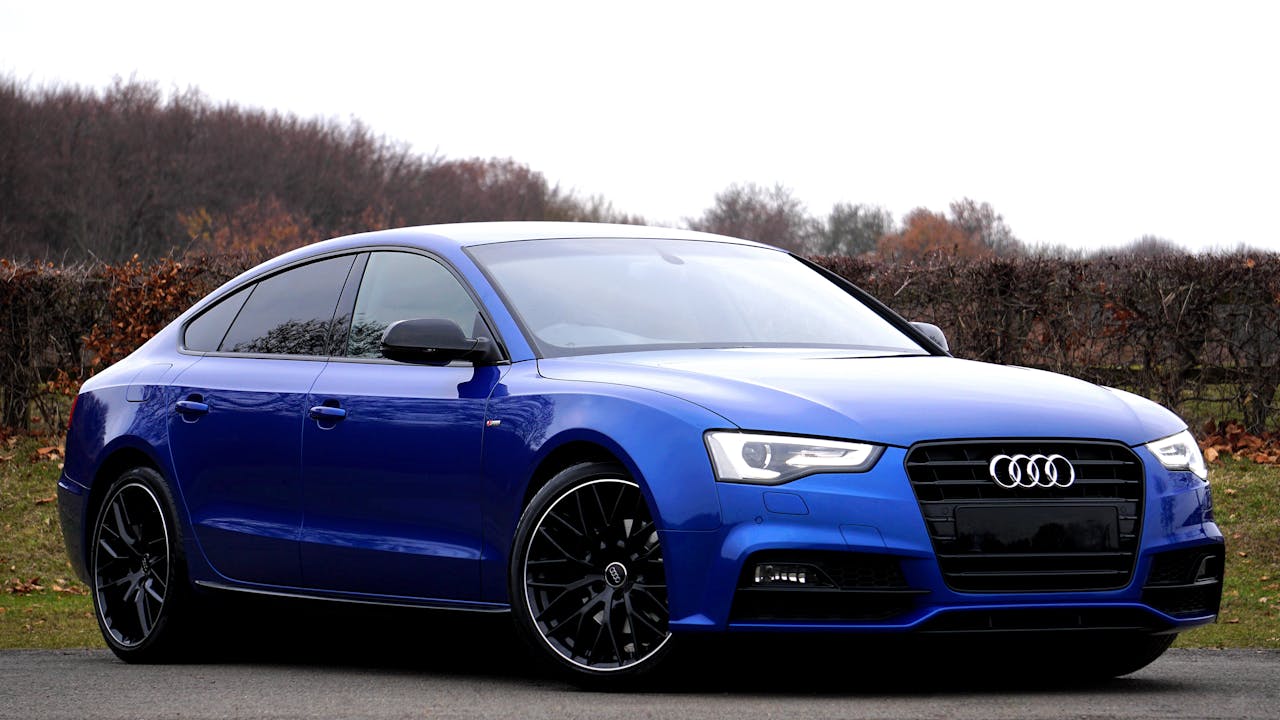
Where to Shoot: Picking the Right Location
Realistic Locations Matter
While it might be tempting to place your car in front of a scenic view, it’s important to keep the location realistic. A grassy hill bathed in sunset light might look beautiful, but it’s not reflective of the kind of environment students will experience with you. Instead, try shooting on a tidy suburban street — something simple, realistic, and relevant to driving lessons.
Tidy Suburban Streets vs. Busy Town Streets
A clean, quiet street works best as a backdrop for your car. Avoid highly busy or cluttered locations as they might distract from the vehicle and intimidate new learners. Too much going on in the background can also make the car appear smaller or less important in the shot.
Avoiding Distractions and Cluttered Backgrounds
Look out for anything in the background that could distract from the car. Passersby, animals, or objects like telephone poles or traffic signs growing out of your car in the image can look awkward. Ideally, shoot against a simple, neutral background like a wall, hedge, or building.
How to Shoot: Framing the Perfect Shot
Simple Composition for Clear Branding
The focus should always be on the car. Avoid complicated compositions or overly creative angles that might detract from the main subject. Keep it simple — take straight-on shots from both the front and rear, as well as side profiles. This ensures that prospective students can easily view the car from all angles and see your branding clearly.
Eye-Level Shots and Straight-On Perspectives
For the most natural and flattering results, shoot at eye level with the car. Aiming too high or too low can distort the image, making the car appear less attractive. Straight-on shots will give a clear view of the vehicle’s size and shape.
Using Different Angles for Variety
Once you’ve captured the basic shots, feel free to experiment with other angles. Try close-ups of the car’s details (like the logo or the wheel) or slight shifts in perspective to add variety. However, keep these additional shots to a minimum — the focus should still be on the car as a whole.
Post-Processing: Enhancing Your Car Photos
Why Post-Processing Is Essential
After shooting your car, the next step is to enhance the image. Sometimes, the lighting may not be perfect, or you may need to crop out a distracting background. Post-processing allows you to fine-tune the image for better quality.
Basic Editing Tips
Start by adjusting brightness, contrast, and saturation to make the colors pop. If the image is too dark, increase the exposure slightly. You can also sharpen the image if it appears too soft or blurry.
Using Software and Apps for Better Results
If you’re looking for a professional finish, consider using photo-editing software like Adobe Photoshop or GIMP. These programs give you more control over the image and allow you to make precise adjustments. For those who prefer mobile apps, Snapseed is an excellent option that’s free to use on both iOS and Android.
Conclusion
Taking great photos of your car is an essential step in promoting your driving school and building trust with potential students. By following these six simple steps — from cleaning your car and choosing the right camera to picking the perfect location and time to shoot — you can easily achieve professional-looking images without breaking the bank. Remember, simplicity is key: focus on showcasing your car clearly and authentically.
FAQs
Can I Use My Phone for Professional Car Photos?
Yes! Modern smartphones have excellent cameras that can produce high-quality photos for online use, as long as you follow the tips for good lighting and composition.
What if My Car Isn’t in Perfect Condition?
While it’s ideal to have a flawless car, small imperfections aren’t the end of the world. Just make sure the damage isn’t too noticeable and focus on presenting your vehicle in the best light possible.
Should I Avoid Using Filters?
Yes, it’s best to avoid heavy filters, as they can make the photo look unprofessional. Stick to basic edits like brightness and contrast adjustments instead.
What’s the Best Software for Editing Car Photos?
Adobe Photoshop is a top choice for professionals, but GIMP is a free alternative. For simpler edits, apps like Snapseed work well for mobile users.
Can I Take Photos in the Winter or Bad Weather?
Yes, but be mindful of lighting conditions. Snow can reflect light beautifully, but poor weather can create dull or blurry photos. Be strategic and plan your shoots accordingly.
Main Image By Pexels
Leave a Reply